Protecting Xamarin Apps
Note: If you are using Dotfuscator Community Edition, or Dotfuscator Professional 4.33 or earlier, please instead follow a different version of these instructions.
These instructions will walk you through how to get started using Dotfuscator to protect a Xamarin project. After you're done, the protection process will be integrated into your project, so whenever you build the project in Visual Studio or MSBuild, Dotfuscator will automatically protect it. You can apply these steps to each platform your app supports, creating an app with a proven, layered protection strategy, no matter what device it's running on.
Note: This Dotfuscator-Xamarin integration has been designed to work on Android, iOS, and the Universal Windows Platform (UWP). Other platforms, particularly Windows 8.x platforms, are not supported by these instructions.
How Dotfuscator Integrates into the Build Process
Before starting, it is helpful to have an understanding of where Dotfuscator inserts itself into the build system. The following diagrams give a broad overview of the various platforms in a Xamarin solution.
Android
For a Xamarin Android project, Dotfuscator will insert itself into the build after compiling the MSIL and before the Xamarin Android apk packaging step.

iOS
An iOS build is slightly more complex. The C# compiler and Dotfuscator will run on Windows followed by the Xamarin iOS packaging step which will run remotely on a Mac OS computer.

UWP
A Xamarin UWP project is structurally very similar to a Xamarin Android project. Dotfuscator will inject itself before the appx packaging step.

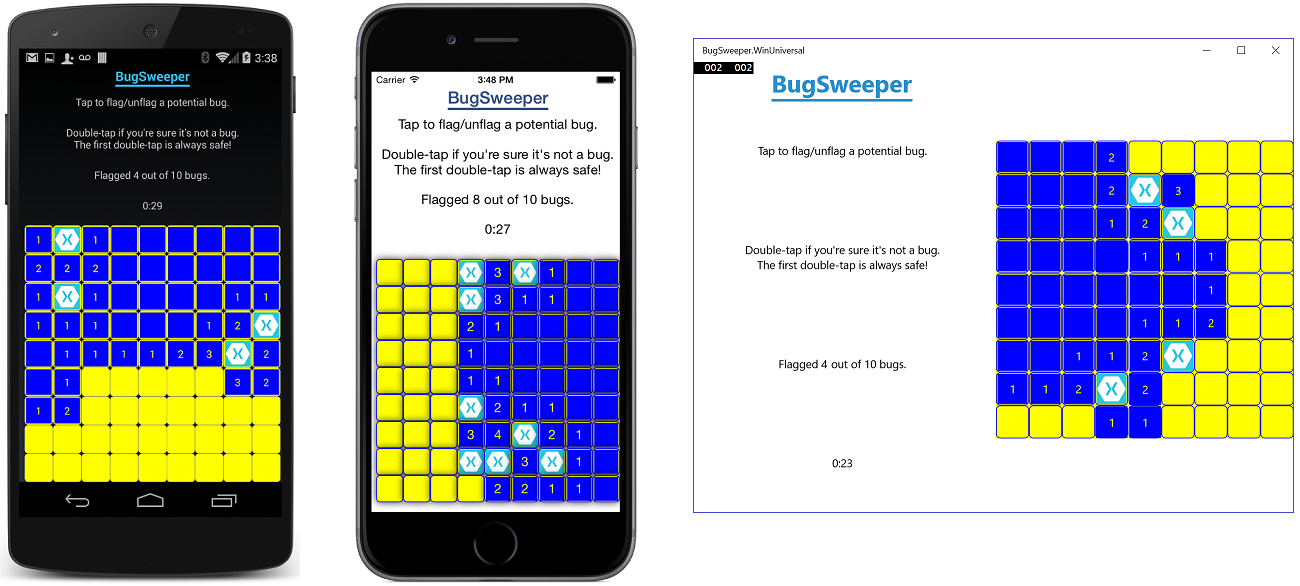
Example App
The example for these instructions will be a Xamarin.Forms sample app named BugSweeper. It's a classic game, this time targeting Android, iOS, and Windows 10 devices.
How to Follow Along
There are a few ways to follow along with these instructions:
You can download BugSweeper yourself and step through these instructions.
You can download the git repository we made while writing these instructions to see how these instructions are applied at every step.
You can apply these instructions to your own app, using this as a reference.
You can click the screenshots in these instructions to view them at their full sizes.
Build the App for the First Time
First, download the BugSweeper ZIP archive from the Xamarin website and extract it to a new directory (example: C:\code\BugSweeper).
You can then add the directory to local source control (such as a git repository).
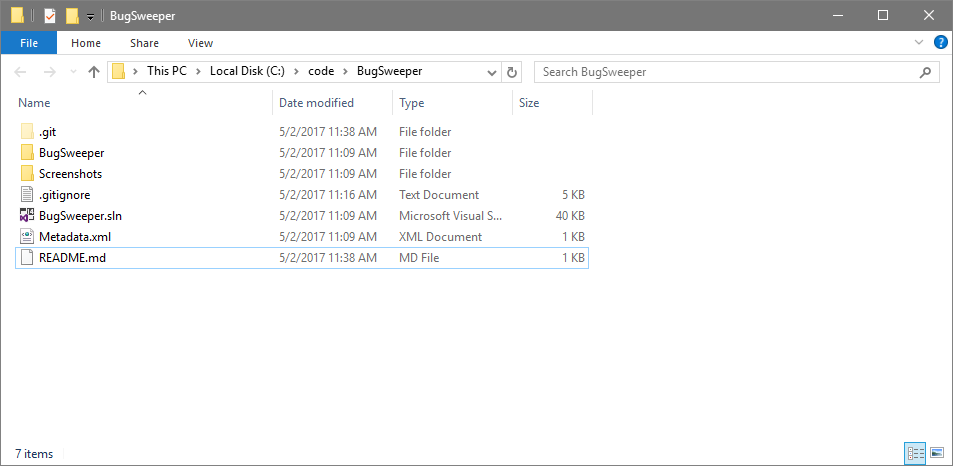
Next, open the BugSweeper.sln solution file in Visual Studio 2017.
Upon doing so, you'll get a warning saying that Windows 8.x projects will not load:
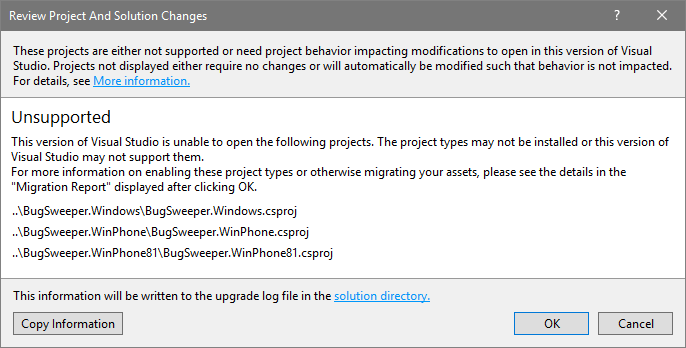
Click OK and finish loading the solution.
Note: You may receive another warning, stating that you need to download Universal Windows Platform (UWP) components in order to open a project in this solution. If you are not developing your Xamarin app to target UWP, then you can ignore this warning and continue through the instructions, ignoring steps about the
BugSweeper.UWPproject.
Solution Explorer shows the projects in the solution:
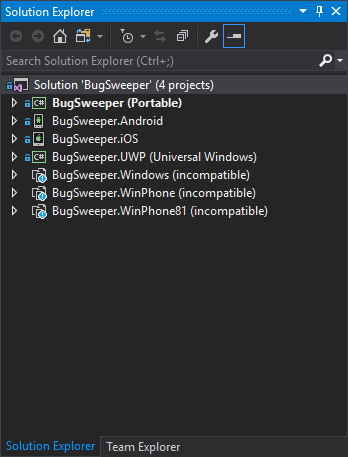
The solution consists of a Portable Class Library (PCL) and several platform-specific output projects that reference the PCL:
BugSweeperis the PCL that contains shared game logic and platform-agnostic business logic.BugSweeper.Androidis an output project for Android devices.BugSweeper.iOSis an output project for iOS devices.- Note that, due to a Xamarin bug from when this sample was created, the output assembly for this project is named
FormsTemplateiOS. We recommend changing it toBugSweeper.iOSfor consistency.
- Note that, due to a Xamarin bug from when this sample was created, the output assembly for this project is named
BugSweeper.UWPis an output project for the Universal Windows Platform (e.g., Windows 10).- Note that the output assembly for this project is named
BugSweeper.WinUniversal.
- Note that the output assembly for this project is named
As indicated by the warning when opening the solution, the remaining projects (BugSweeper.Windows, BugSweeper.WinPhone, and BugSweeper.WinPhone81) do not load because Visual Studio 2017 does not support their platforms.
Per the note at the top of this page, these instructions don't support those platforms either.
Remove the unsupported projects from the solution, save the solution, and remove the relevant project directories from local source control.

With the all of the supported projects loaded, test building and running the app to make sure it works as intended (and definitely not just to have an excuse to play the game during work hours).
Once you've done that, it's time to protect the app.
Setup
Before you can start integrating Dotfuscator into the Xamarin build pipeline, you need to decide what projects, and what configurations of those projects, you want to protect. Then you must setup Dotfuscator on the machines that will be building a protected project/configuration combination.
Select What to Protect
Visual Studio solutions consist of multiple projects, each of which produces a .NET assembly. Each project can be built in multiple configurations, such as Debug or Release.
The Dotfuscator-Xamarin protection described in these instructions operates on a single project/configuration combination at a time. You therefore should, at the outset, decide what projects and configurations will be protected. For help deciding, see the guidelines for what to protect.
For this example, we suggest protecting:
BugSweeper.Androidin the Release configurationBugSweeper.iOSin the Release, Ad-Hoc, and AppStore configurationsBugSweeper.UWPin the Release configuration
But what about protecting the shared code in the BugSweeper portable class library?
Well, because each output project references the PCL, the unobfuscated PCL will be copied to the output project's binary directory.
The integration will then obfuscate both the unobfuscated PCL copy and the unobfuscated platform-specific assembly at the same time.
This way, the PCL is also protected when it is packaged within an app for the given platform.
Set Up Dotfuscator
Each machine that will be building a protected project/configuration combination will need to have Dotfuscator installed, with that installation's command line interface active.
Your entire team should use Professional Edition to ensure the same level of protection no matter who builds the app.
Select a Project
Earlier, you decided what projects you wanted to protect. We recommend following the remaining steps in these instructions with one of those projects at a time. Later, you'll repeat the process for each remaining project -- we'll tell you when it's time to do this.
Our example from here on will focus on BugSweeper.Android, though we will also mention details required for iOS and UWP projects.
Integrate Dotfuscator with your Xamarin Project
Follow the instructions for integrating Dotfuscator's MSBuild targets, PreEmptive.Dotfuscator.Common.Targets, into the project you selected before moving on to repeat the process for the remaining projects.
Apply to Other Projects
At this point, you should repeat these instructions, starting from the Select a Project section, for the remaining output projects you chose to protect.
For example, let's say we just finished protecting BugSweeper.Android.
We now repeat these instructions for BugSweeper.iOS, then for BugSweeper.UWP.