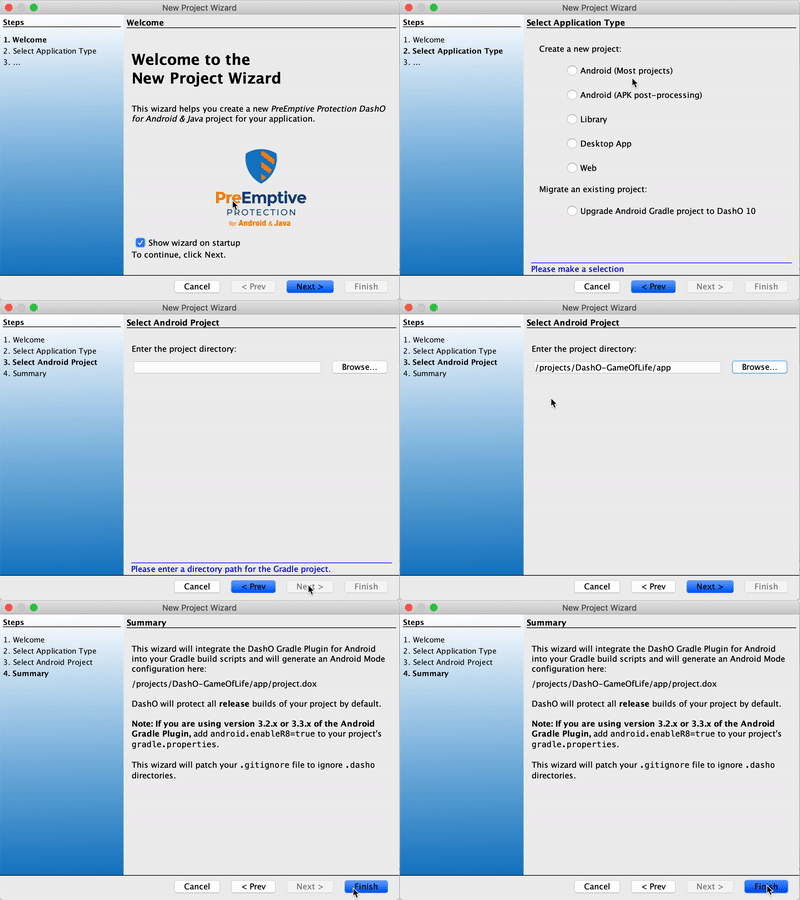
Over a year ago we wrote instructions for migrating from ProGuard or DexGuard to DashO. Since that time, Google introduced R8, fundamentally changing the Android build process. Now, we have released PreEmptive Protection DashO for Android & Java, version 10.0 with a new Android Mode that is designed to work with R8. With this release, migrating from ProGuard or DexGuard to DashO is so simple that it almost doesn’t need instructions – so we’re posting new instructions to make that clear!
Welcome to our new instructions!
Before we begin, let’s make sure we’re all on the same page. We assume you are currently:
Now, to update your app (or AAR project) to use DashO (v10.0 or above) and R8:
That’s it!
From now on, your (release) builds will be automatically protected by DashO and R8. DashO will automatically apply advanced protections like Control Flow and String Encryption (and you will almost certainly want to add Checks, too), and R8 will perform minification and optimization using the exact same ProGuard config file(s) you were using before.
There are a few things you should do to wrap up:
We mentioned above that we’d cover DexGuard instructions later. Migrating from DexGuard is the same basic process, but first you have to turn DexGuard off. The instructions in our earlier blog for DexGuard are still relevant for DashO 10; just be sure to come back here and use the Wizard, once you are done removing DexGuard, rather than following the older migration instructions.
And that’s it!
If you have any questions or concerns, please reach out to our support team or sales team.
And welcome to DashO!