At Microsoft Build 2016, we introduced a new feature for Dotfuscator Community Edition (CE): command line support. This will allow you to integrate Dotfuscator into your automated build process, so that your builds and releases can automatically use Dotfuscator for obfuscation, tamper protection, usage tracking, and expiration. To help you get started, this post will walk through how to use the command line interface (CLI), as well as how to integrate it into MSBuild and Visual Studio for automated builds.
Note: This blog post was originally written for Dotfuscator CE version 5.19.2, which shipped with Visual Studio 2015 Update 3. Dotfuscator CE version 5.27.0, which ships with Visual Studio 2017, continues to offer command line support to registered users. However, the newer version of Dotfuscator CE no longer includes the sample project mentioned in this blog post; instead, a slightly different sample project is hosted on our Support page.
Note that command line support is only available in Dotfuscator CE version 5.19.2 and later. See this page to learn how to download, install, and enable the command line interface. After doing so, assuming a default installation of Visual Studio, Dotfuscator CE is located at this path:
[Program Files]Microsoft Visual Studio 14.0PreEmptive SolutionsDotfuscator and Analytics Community Edition
And the sample project we’ll be using is located at:
[CE directory]samplesHelloWorld
Because this directory requires elevated permissions to edit, we recommend copying the sample to a different location, such as your Desktop. The rest of these instructions assume this copied directory is your working directory.
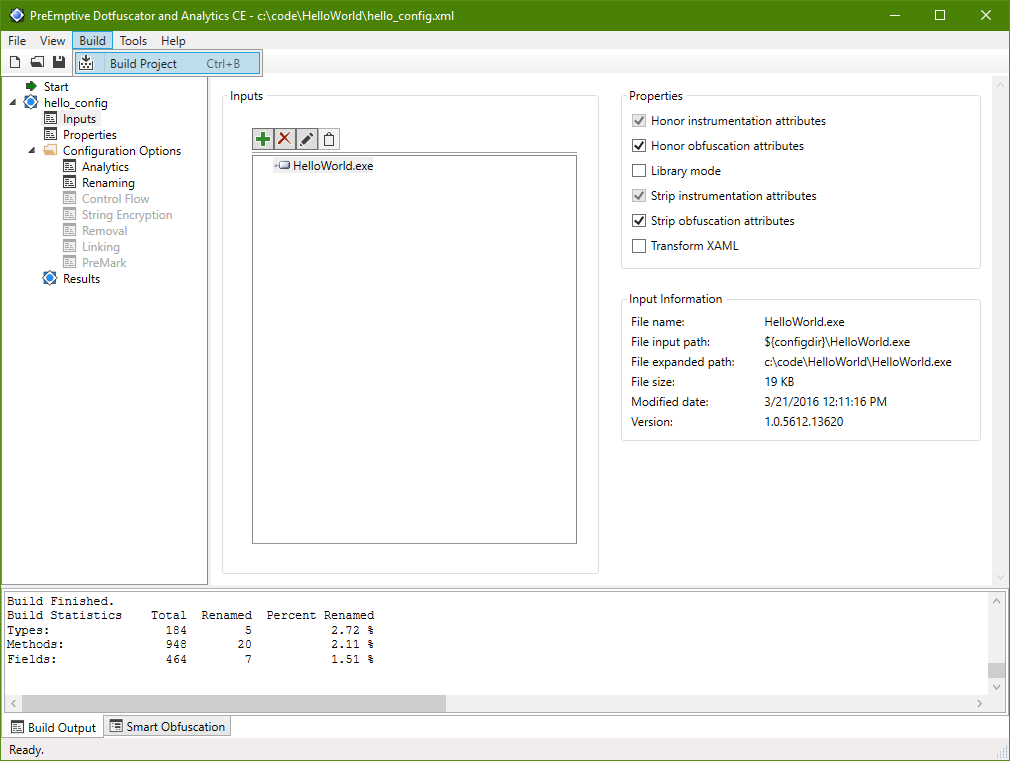
The sample’s input consists of a single executable .NET assembly, HelloWorld.exe, derived from one C# code file, Hello.cs. Also included is a Dotfuscator configuration file, hello_config.xml. You can open it in the Dotfuscator CE GUI by running the command:
[CE directory]dotfuscator.exe hello_config.xml
You can build the sample project from the GUI (Build -> Build Project).
This will output an obfuscated (and instrumented) assembly in the dotfuscated subdirectory, alongside a map file showing how symbols were renamed.
To build our sample from the command line, we simply specify the configuration file as an argument to the CLI executable:
[CE directory]dotfuscatorCLI.exe hello_config.xml
The output will contain the typical build output you would see in the GUI, including exclusions due to Smart Obfuscation. The build results will be the same as if we had opened the project in the GUI and built it there: an obfuscated output, alongside a renaming map file, in the dotfuscated subdirectory.
Command line builds are useful, because they can be automated. Take this simple MSBuild project, for instance, which uses the Exec task to call Dotfuscator CE.
<Project
DefaultTargets="Build;Obfuscate">
<ItemGroup>
<Compile Include="hello.cs" />
</ItemGroup>
<Target Name="Build" >
<Csc Sources="@(Compile)" OutputAssembly="HelloWorld.exe"/>
</Target>
<Target Name="Obfuscate" DependsOnTargets="Build" >
<Exec Command=""C:Program Files (x86)Microsoft Visual Studio 14.0PreEmptive SolutionsDotfuscator and Analytics Community EditionDotfuscatorCLI.exe" hello_config.xml" />
</Target>
</Project>
Note the use of escaped quotation-marks — " — in the Command attribute’s value. Quotation marks are required because the path to the CLI contains spaces, and they must be escaped to fit into the XML syntax.
You can copy and save this project file as HelloWorld.csproj, then run it from the MSBuild Command Prompt:
msbuild HelloWorld.csproj
MSBuild compiles Hello.cs into HelloWorld.exe, then calls Dotfuscator to obfuscate that assembly, per the configuration file. Just as before, this ultimately creates an obfuscated output in the dotfuscated subdirectory, alongside a renaming map file.
Project files created by Visual Studio also use the MSBuild format. Thus, you can also automatically call Dotfuscator CE in a Visual Studio build as well. Consider this excerpt from a csproj file:
<Target Name="AfterBuild" Condition="'$(Configuration)' == 'Release'">
<Exec Command=""C:Program Files (x86)Microsoft Visual Studio 14.0PreEmptive SolutionsDotfuscator and Analytics Community EditionDotfuscatorCLI.exe" config_file.xml" />
</Target>Whenever Visual Studio builds this project in the Release configuration, it will also call Dotfuscator CE, executing whatever configuration is saved in config_file.xml.

There’s an interesting aspect of the sample hello_config.xml configuration that’s useful for command-line use and build integration.
By default, when you add an input to a Dotfuscator project, the configuration refers to the input by its absolute path. But recall that you were able to copy hello_config.xml and its inputs to another directory and still have Dotfuscator correctly find the inputs when run. This is because the configuration specifies its inputs by paths relative to the configuration file, instead of the default absolute paths.
Specifically, the input is specified in the configuration as:
${configdir}HelloWorld.exe
This notation uses the project property configdir. Project properties are variables that can stand-in for file directory and name values within the configuration. In this case, configdir is a property that is always set to the absolute path of the directory holding the current project’s configuration file.
Thus, as long as HelloWorld.exe is a sibling of the configuration file, the project can find and use this assembly as an input. The configuration also uses the configdir property when specifying the output location of the obfuscated assembly and the renaming map file.
When creating your own Dotfuscator configuration, you may wish to use this pre-populated project property, thus making your configuration portable between, for instance, a development machine and a build server. You can also specify your own project properties, and set their values from the command line. For more details, see the Properties section of the Dotfuscator CE Help.
While we have provided command line support for CE as a way to automate the obfuscation process, please take note of CE’s specific licensing restrictions. The Dotfuscator CE license expressly prohibits the use of Dotfuscator CE by commercial organizations for anything other than personal research and education. If you would like to use Dotfuscator on commercial projects, please consider evaluating Dotfuscator Professional Edition.