Dotfuscator Community Edition (CE) has long been a staple of the Visual Studio experience, providing industry-standard reverse-engineering protection to .NET applications. With the release of Visual Studio 2015 Update 3, we’re extending this pedigree to applications for the Universal Windows Platform (UWP), also known as universal apps. This blog post will show you how to integrate Dotfuscator CE into the Visual Studio build process for UWP applications.
Page Contents
Before we begin, there are a few things you will need in order to build UWP apps and protect them with Dotfuscator. These instructions assume you already have Visual Studio installed with the capability of building UWP apps.
Support for UWP apps in Dotfuscator CE began with Visual Studio 2015 Update 3. If you are using an earlier version of Visual Studio, you will need to upgrade. As part of the Visual Studio 2015 upgrade, Dotfuscator CE will automatically be updated to version 5.22.0, ready to support UWP apps.
The version of Dotfuscator CE included with Visual Studio 2017 already supports UWP apps. You may already have Dotfuscator CE installed; search for dotfuscator in Visual Studio 2017’s Quick Launch (Ctrl+Q):
Note: This section is only required if you are using Dotfuscator CE’s Checks or Analytics.
Dotfuscator CE’s Checks and Analytics features currently only support Windows 10 SDK version 10.0.10240. Thus, if you wish to use this feature, you must set this version as the Min version in your application’s projects
Windows 10 (10.0; Build 10240).If this option does not appear, you will need to install this version of the Windows 10 SDK:
Windows 10 SDK (10.0.10240) node.Windows 10 SDK (10.0.10240.0) item.Integrating Dotfuscator CE with the build process requires use of the command-line interface, which is only available in registered copies of CE. If you have not already registered CE:
To start, let’s create a project in Dotfuscator CE for the relevant assemblies from your application.
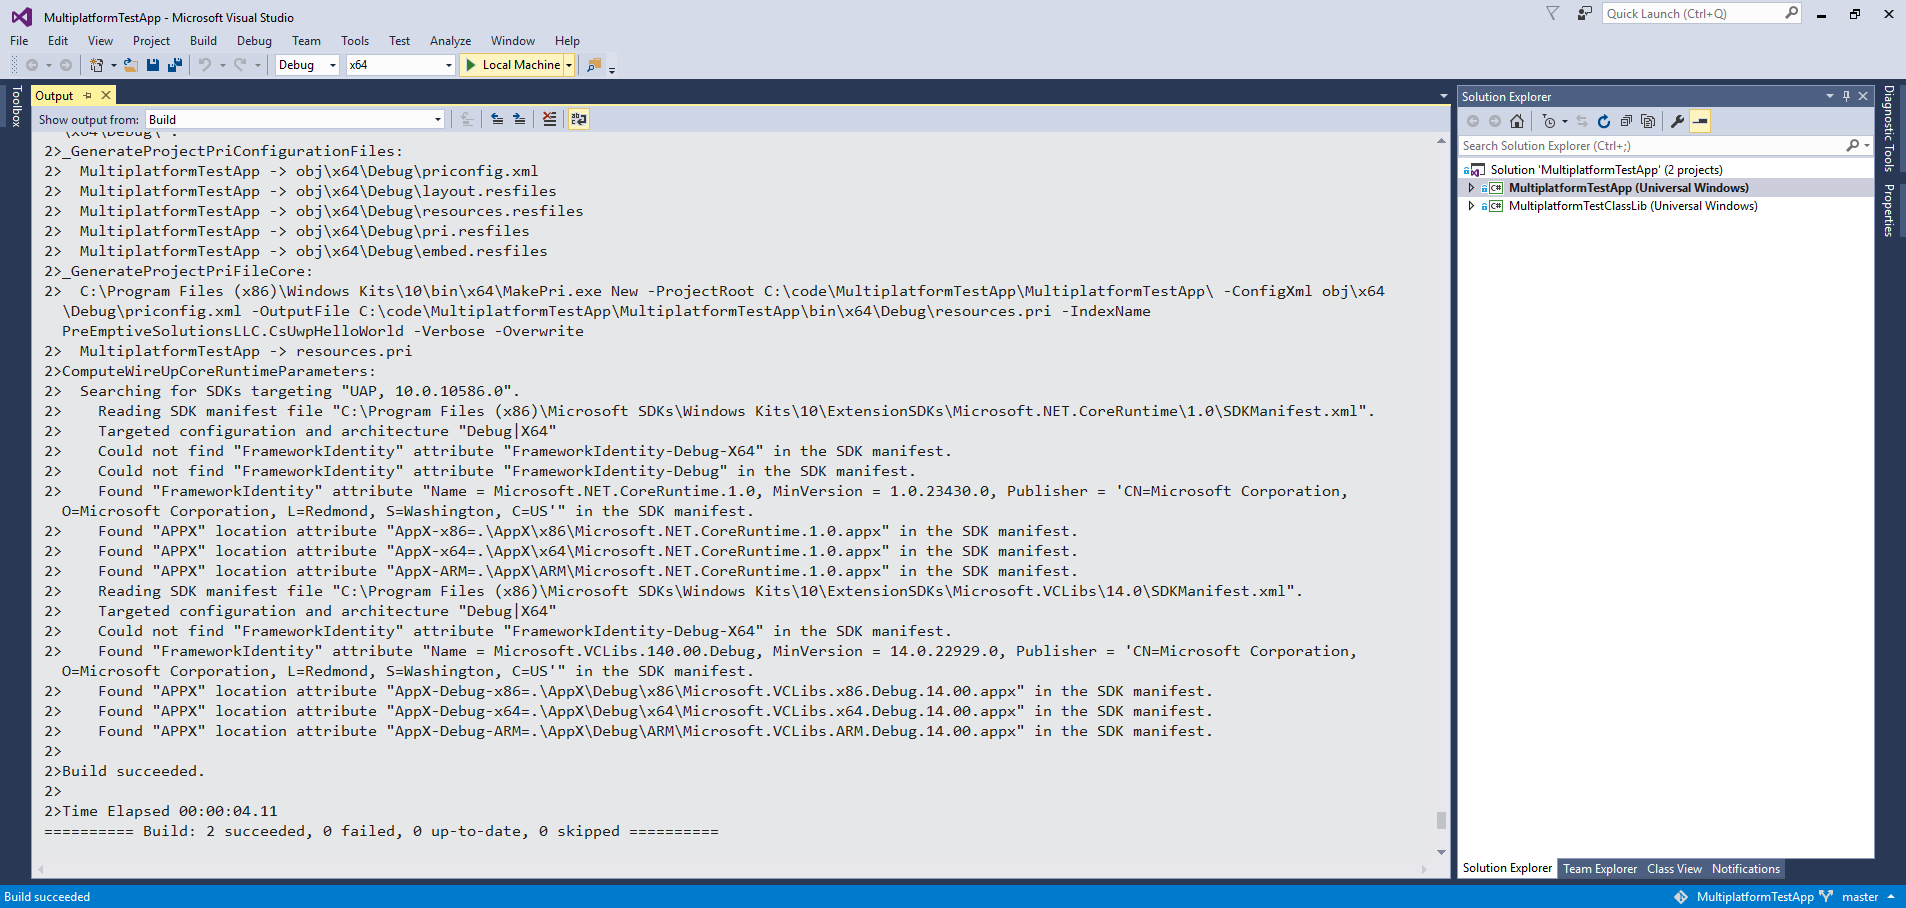
We first need a set of unobfuscated assemblies and markup for Dotfuscator to take as input. We will use the output of the Debugconfiguration as our input when configuring Dotfuscator, though our final integration with Visual Studio will use the Releaseconfigurations instead.
To build the inputs needed for Dotfuscator:
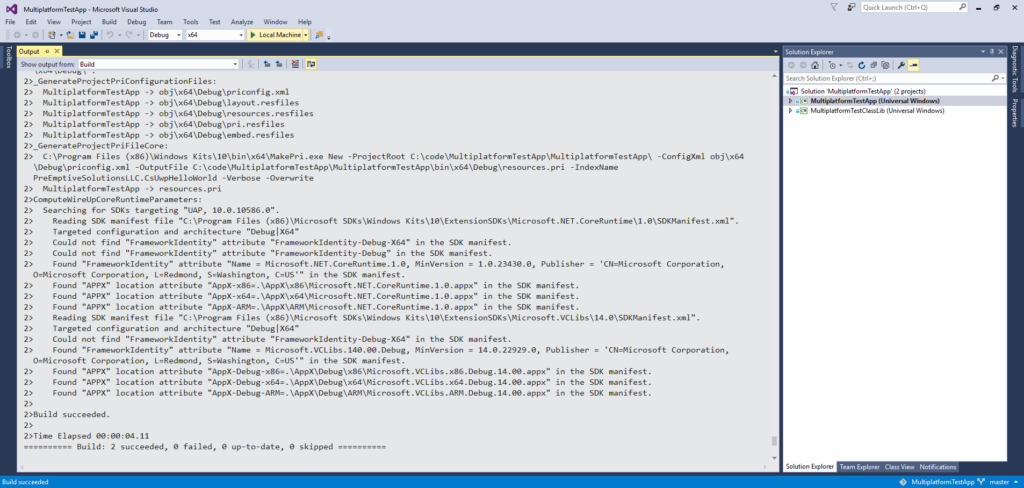
For the next sections, we need to know the paths to these files. To locate the built files after the build is complete:
.csproj) for your startup project. We will refer to this as the project directory.bin, then the appropriate subdirectory for your built platform and configuration (e.g., binx64Debug). We will refer to this as the debug build directory.In Visual Studio, open Dotfuscator CE via Tools -> PreEmptive Protection – Dotfuscator.
Add the inputs to your new Dotfuscator project:
Folder Select.Dotfuscator.xml in your project directory.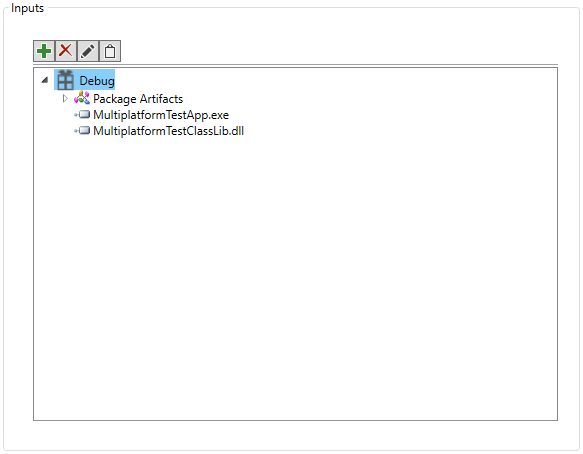
Because UWP apps are built for multiple processor architectures, we don’t want to hardcode our inputs to draw from a specific directory on-disk. Instead, we will use Dotfuscator project properties to stand in for the path to the input directory. This way, we only have to make one Dotfuscator project for all architectures the app will support.
Dotfuscator automatically defines a project property, configdir, representing the absolute path to the project directory (in general, the directory where the Dotfuscator project is saved).
We will additionally define a builddir property, representing the relative path from the project directory to the build directory. We will use the debug build directory as our default value for this new property. When we integrate Dotfuscator with Visual Studio, we will set this property to the appropriate path for each Release build – i.e., the release build directory.
To set up the builddir project property:
builddir.binx64Debug).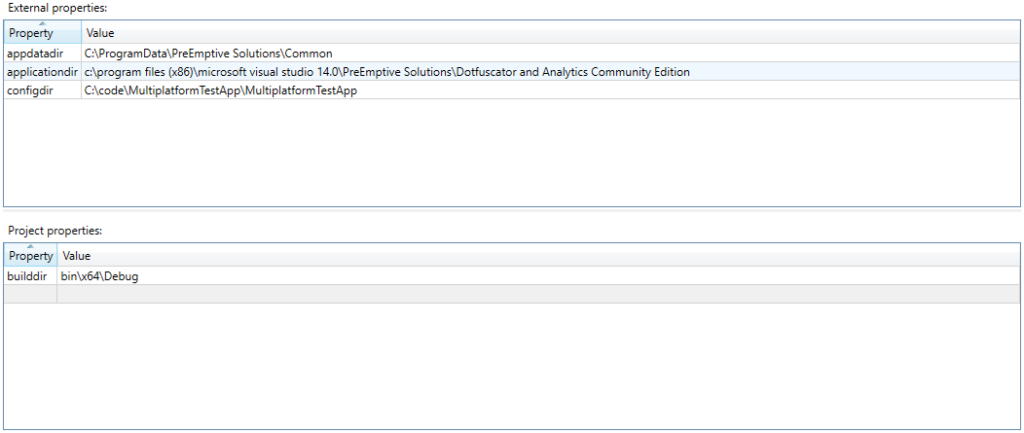
To use the project properties in the input path:
${configdir}${builddir}.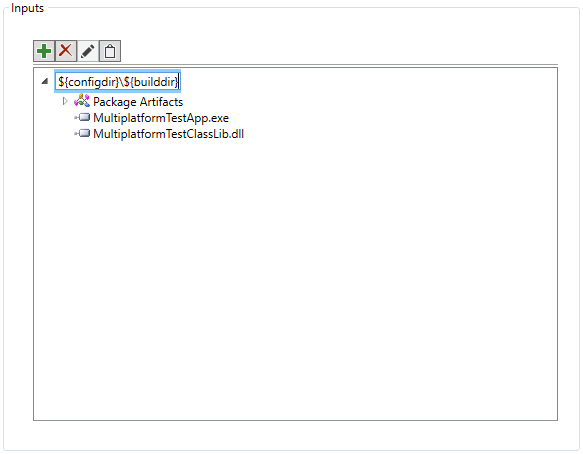
Now, we will be able to supply an argument to Dotfuscator CE’s command-line interface to change what assemblies Dotfuscator will process. But because we defined a the Debug configuration’s output path as the default value for this project property, we can use those unobfuscated assemblies as a baseline for configuring the Dotfuscator project.
Before we integrate our project with Visual Studio, we should temporarily disable the protection and analytics transforms done by Dotfuscator CE. This will allow us to verify that our integration is correct before introducing additional complexities with the core features of Dotfuscator.
To disable transforms:
Now that we have our Dotfuscator project set up, we need to have Visual Studio run Dotfuscator CE during its build process. Specifically, we will be adding an MSBuild Target to the Visual Studio project file for the startup project.
To begin editing the Visual Studio project:
Visual Studio will open a text editor for the project file (e.g., YourStartupProject.csproj).
Under the <Project> element, locate the following line:
<Import Project="$(MSBuildExtensionsPath)MicrosoftWindowsXamlv$(VisualStudioVersion)Microsoft.Windows.UI.Xaml.CSharp.targets" />Immediately below that line, insert the following:
<Target Name="AfterGenerateAppxManifest" Condition="'$(Configuration)' != 'Debug'">
</Target>
This creates an MSBuild target that Visual Studio will call while building your UWP app. Specifically, it is called after the assemblies have been created but before they have been packaged or compiled with .NET Native. The exact name AfterGenerateAppxManifest must be used. Otherwise, Visual Studio will not call this target at the appropriate time.
Note also the target’s Condition attribute. We prevent use of this target during Debug builds so that such builds are not obfuscated, and thus easier to debug.
For convenience, we will define a number of MSBuild properties to store paths we will be using in the following steps. Within the target we created, add a <PropertyGroup> similar to the following:
<PropertyGroup>
  <DotfuscatorCLIPath>$(DevEnvDir)....PreEmptive SolutionsDotfuscator and Analytics Community EditionDotfuscatorCLI.exe</DotfuscatorCLIPath>
  <DotfuscatorBuildDir>$(OutDir)</DotfuscatorBuildDir>
  <DotfuscatorConfigPath>$(ProjectDir)Dotfuscator.xml</DotfuscatorConfigPath>
  <DotfuscatorOutputDir>$(ProjectDir)Obfuscated</DotfuscatorOutputDir>
  <DotfuscatorOutputMapPath>$(ProjectDir)ObfuscationMapsRenaming.xml</DotfuscatorOutputMapPath>
</PropertyGroup>
Where:
DotfuscatorCLIPath is the path to the Dotfuscator CE CLI executable (located in Visual Studio’s install directory).DotfuscatorBuildDir is the path to the release build directory. In this case, we just re-use the value of OutDir, the output directory of the Visual Studio build. This property will change depending on which processor architecture Visual Studio is building, directing Dotfuscator to the appropriate unobfuscated assemblies to take as input.DotfuscatorConfigPath is the path to the project file we created for Dotfuscator CE.DotfuscatorOutputDir is the path to a directory where obfuscated assemblies will be placed. We’ll refer to this as the obfuscation output directory.DotfuscatorOutputMapPath is the path to an XML file that will contain information about how Dotfuscator CE renamed symbols within the processed assemblies. This is useful for understanding stack traces in obfuscated versions of your application. Each execution of Dotfuscator will create a new map file, renaming any existing ones.Next, add an <Exec> element after the <PropertyGroup>:
<Exec Command=""$(DotfuscatorCLIPath)" /p=builddir=$(DotfuscatorBuildDir) /out="$(DotfuscatorOutputDir)" /mapoutput="$(DotfuscatorOutputMapPath)" "$(DotfuscatorConfigPath)"" />This will call Dotfuscator CE’s command-line interface with the following arguments:
/p=builddir=$(DotfuscatorBuildDir) sets the builddir project property we defined in our Dotfuscator project to appropriate release build directory./out="$(DotfuscatorOutputDir)" causes Dotfuscator CE to write transformed assemblies to the obfuscation output directory./mapoutput="$(DotfuscatorOutputMapPath)" causes Dotfuscator CE to write information about renamed symbols to the appropriate XML file."$(DotfuscatorConfigPath)" causes Dotfuscator CE to use all other settings we specified in our Dotfuscator project file.Note that we surround various paths with quotation marks – encoded in the XML format as " – to handle cases where they contain spaces.
After Dotfuscator CE processes the assemblies, our MSBuild target will need to copy the contents of the obfuscation output directory back to the release build directory, so that the rest of the build pipeline can continue with the obfuscated assemblies and markup.
Add the following after the <Exec> element:
<ItemGroup>
  <ObfuscatedFiles Include="$(DotfuscatorOutputDir)*.*" />
</ItemGroup>
<Copy SourceFiles="@(ObfuscatedFiles)" DestinationFolder="$(DotfuscatorBuildDir)" />At this point, the changes to the Visual Studio project file are complete. For reference, a complete target might look like this:
<Target Name="AfterGenerateAppxManifest" Condition="'$(Configuration)' != 'Debug'">
<PropertyGroup>
<DotfuscatorCLIPath>$(DevEnvDir)....PreEmptive SolutionsDotfuscator and Analytics Community EditionDotfuscatorCLI.exe</DotfuscatorCLIPath>
<DotfuscatorBuildDir>$(OutDir)</DotfuscatorBuildDir>
<DotfuscatorConfigPath>$(ProjectDir)Dotfuscator.xml</DotfuscatorConfigPath>
<DotfuscatorOutputDir>$(ProjectDir)Obfuscated</DotfuscatorOutputDir>
<DotfuscatorOutputMapPath>$(ProjectDir)ObfuscationMapsRenaming.xml</DotfuscatorOutputMapPath>
</PropertyGroup>
<Exec Command=""$(DotfuscatorCLIPath)" /p=builddir=$(DotfuscatorBuildDir) /out="$(DotfuscatorOutputDir)" /mapoutput="$(DotfuscatorOutputMapPath)" "$(DotfuscatorConfigPath)"" />
<ItemGroup>
<ObfuscatedFiles Include="$(DotfuscatorOutputDir)*.*" />
</ItemGroup>
<Copy SourceFiles="@(ObfuscatedFiles)" DestinationFolder="$(DotfuscatorBuildDir)" />
</Target>
Now, reload the project in Visual Studio:
Now that the Visual Studio project has been modified, we can build the project in Visual Studio and have Dotfuscator automatically process the built assemblies and markup.
First, we want to verify our integration is working at the simplest level before we re-enable obfuscation and analytics transforms (i.e., the real work that Dotfuscator does). To do this:
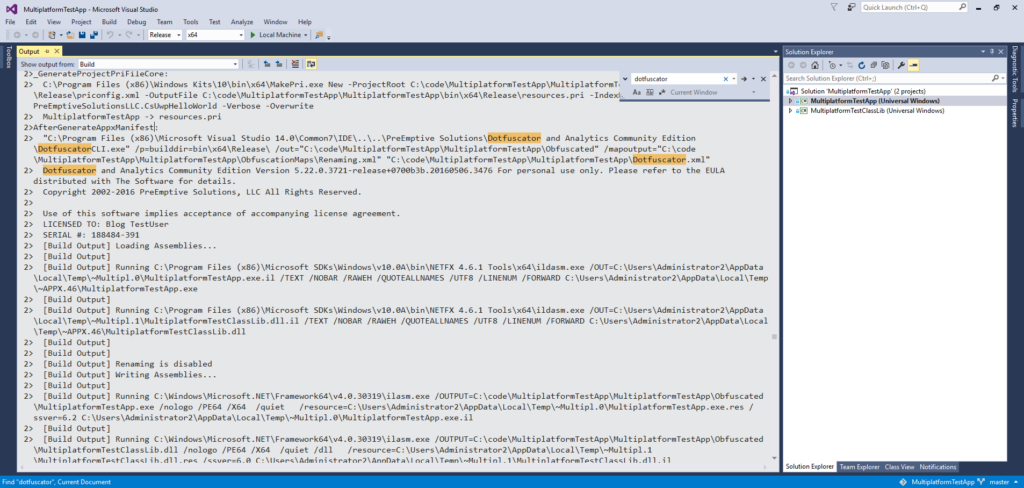
Note that if you instead rebuild in a Debug configuration, Dotfuscator will not run. This is because we prevented our added target from running in that case.
Now that we’ve verified that Dotfuscator has successfully been integrated into Visual Studio’s build pipeline, we need to enable Dotfuscator’s core features: code protection and analytics instrumentation.
To enable transforms:
Then, rebuild your application in a Release configuration. This build will now be obfuscated with Dotfuscator CE’s symbol-renaming algorithms.
Test your application after it’s been obfuscated. While Dotfuscator recognizes many common code patterns, certain scenarios may require some symbols to be excluded from renaming in order to ensure proper application function.
Additionally, if you are working with PreEmptive Analytics, Dotfuscator can inject the appropriate client-side analytics code into your application. (Note that your application’s minimum runtime version must be Windows 10 (10.0; Build 10240) in order to use this feature).
Both renaming exclusions and analytics attributes can be configured from the the Dotfuscator CE GUI, under the Renaming and Analytics nodes, respectively. For more information, refer to the Configuration Options pages of the Dotfuscator CE help.
After configuring and saving the Dotfuscator project, you will need to Rebuild your application in a Release configuration for the new rules to take effect.
Note: Recall that when configuring via the Dotfuscator CE GUI, the contents of the debug build directory are used as input. Before you use the GUI, you should make sure the Debugbuild selected earlier is built and up-to-date with respect to your current code.
Once you have configured obfuscation for your application, you can package it for testing and release from the Project -> Store -> Create App Packages… option in Visual Studio.
Note the first question the wizard asks: “Do you want to build packages to upload to the Windows Store?”
While this blog post focused on Dotfuscator Community Edition (CE), we’ve also written a blog post on using Dotfuscator Professional Edition to protect UWP apps. One notable difference comes from Professional Edition’s included DotfuscateMSBuild task, which allows even easier integration into Visual Studio.
Even if you’re not using Professional Edition, you may still want to check out the linked post. It details an alternative UWP obfuscation method, where Visual Studio builds the application normally, and Dotfuscator acts on the packaged .appx files. Dotfuscator CE also works with this UWP package format, but we felt it would be more common for developers to use the Visual Studio integration method we’ve outlined in this post.
Please also take note of Community Edition’s specific licensing restrictions. The Dotfuscator CE license expressly prohibits the use of Dotfuscator CE by commercial organizations for anything other than personal research and education. If you would like to use Dotfuscator on commercial projects, please consider evaluating Dotfuscator Professional Edition.